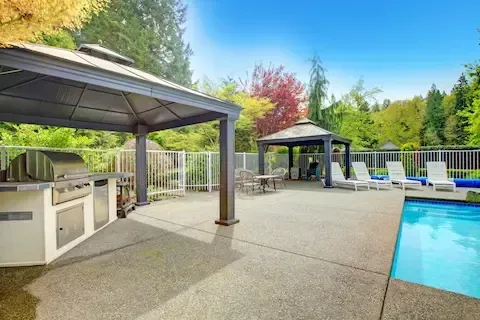
How to Design Concrete Patio Drainage for Camas Wet Winters
Designing concrete patio drainage for Camas wet winters means building the right slope, selecting drain placement early, and preparing a base that handles heavy Pacific Northwest rainfall. Camas receives over 40 inches of rain annually, so drainage is not optional — it is structural. A patio without proper drainage develops standing water, surface cracking, and undermined base layers within a few seasons. The core principle is simple: water must move away from your home and off the slab quickly, through slope, surface drains, or channel drains built into the design before the concrete is ever poured.
Step 1: Calculate the Correct Slope for Your Patio Slab
Every concrete patio in Camas needs a minimum slope of one-quarter inch per linear foot, directed away from the house foundation. In practice, this means a 12-foot-deep patio drops three inches from the wall edge to the outer edge. Some contractors in the Pacific Northwest build to three-eighths inch per foot in exposed areas with no overhead coverage, because heavier seasonal rainfall loads demand faster sheet drainage. Mark your slope stakes before excavation begins, not after forming. Getting the slope calculation wrong at the forming stage means grinding or resurfacing later, which is costly and weakens the finished surface.
Step 2: Choose Drain Type Based on Patio Layout
Camas properties vary — some patios are open, others are surrounded by landscaping, fences, or structures on multiple sides. The drain type you choose depends on where water can realistically exit. For patios that slope toward a yard or lawn, sheet drainage off the slab edge is usually sufficient. For enclosed patios or those adjacent to retaining walls, a channel drain or linear trench drain installed at the low end of the slab collects runoff before it pools. Point drains work in the center of covered patios where the slope runs inward. Never rely on gravel borders alone to absorb water in Camas winters — soil saturation happens quickly and gravel loses drainage capacity when subsoil is already wet.
Step 3: Prepare a Compacted Base That Supports Drainage
The concrete slab sits on a base layer, and that base determines whether water undermines your patio over time. In Camas, standard practice is four to six inches of compacted crushed rock, graded at the same slope angle as your finished slab. Crushed rock — not pea gravel or topsoil — provides both structural support and a drainage path beneath the slab if any moisture infiltrates from below. Compact in two-inch lifts and test firmness before forming. A poorly compacted base in Pacific Northwest clay soil will shift during freeze-thaw cycles in January and February, causing cracking and uneven settlement that redirects water toward the foundation instead of away from it.
Step 4: Install Drain Infrastructure Before Pouring
Channel drains, outlet pipes, and any underground drainage connections must be set and secured before the concrete pour. This step is where many DIY patios fail — homeowners pour first and try to add drainage after, which requires cutting the slab and creates weak joints. Set your channel drain body at the correct elevation relative to your slope before the forms go in. Connect the drain outlet to a solid pipe that exits to daylight, a dry well, or a storm drainage connection if your Camas property permits it. Check Clark County stormwater rules before connecting to municipal systems, as some connections require permits. patio installation planning should always include this infrastructure review before the project starts.
Step 5: Select Concrete Mix and Finish for Wet Conditions
In the Pacific Northwest, concrete exposed to persistent moisture performs better with a low water-to-cement ratio and air entrainment. A 4,000 PSI mix with five to seven percent entrained air handles freeze-thaw expansion better than a standard 3,000 PSI mix. Specify a broom finish rather than a smooth trowel finish — broom texture provides grip when wet and improves sheet drainage slightly by breaking surface tension. Avoid stamped patterns with deep relief in areas that collect standing water, since those recesses hold moisture against the surface longer and accelerate surface wear over multiple wet seasons.
Step 6: Seal Joints and Edges After Curing
Control joints and the perimeter edge of the slab are the most common entry points for water infiltration in Camas patios. After the concrete cures — typically 28 days — fill control joints with a polyurethane or silicone joint sealant rated for exterior use. Apply a penetrating concrete sealer to the full surface to reduce moisture absorption. Reseal every two to three years. This maintenance step is frequently skipped, but in a climate like Camas where rain runs from October through April, unsealed joints allow water to reach the base layer and begin the erosion cycle that leads to slab movement. For more background on how patios are built in this region, see our article on concrete patios in Camas WA.
Step 7: Verify Drainage Direction After the First Rain
Once the slab has cured, test your drainage during an actual rain event or with a garden hose running at volume. Walk the patio perimeter and watch where water sheets, where it hesitates, and whether any low spots collect standing water. Minor issues with drainage direction can sometimes be addressed with a concrete overlay or resurfacer before the problem compounds. Major issues — water running toward the foundation, a drain that empties too slowly, or large flat areas that pond — need professional evaluation. Catching these problems in the first season is far less expensive than addressing foundation moisture damage or a heaved slab two years later. The same slope and base principles apply on the other side of the house. Read driveway drainage design for Camas properties.
